Imagine this: a sudden craving for something sweet, a last-minute potluck invitation, or a sweltering summer day when turning on the oven feels like a cruel joke. What’s your dessert superhero? For generations of home cooks, the answer has been undeniably clear: Classic No Bake Cookies. These delightful stovetop treats are a testament to culinary ingenuity, offering rich, chocolatey, peanut butter goodness without ever needing to preheat a single oven.
Far from a mere quick fix, these aren't just any no bake cookies; they are a perfectly engineered confection designed for simplicity and maximum flavor. Forget the days of crumbly messes or gooey disasters. This guide dives deep into the "stovetop magic" that guarantees your batch of these iconic chocolate beauties will set perfectly every single time, delivering that satisfying chewy texture and deep, comforting taste you crave. Ready in a flash, with minimal ingredients, prepare to change your dessert game forever.
The Timeless Appeal of No Bake Cookies: Why We Love Them
The story of the classic no bake cookie is deeply woven into the fabric of American home baking, cementing its status as a beloved staple since the 1950s. Their rise to fame coincided with an era when convenience and clever shortcuts were highly valued in the kitchen, and their popularity has only grown. But what is it about these humble cookies that resonates so strongly across decades and demographics?
Primarily, it’s the sheer practicality. They are the ultimate solution for a host of common culinary dilemmas:
- No Oven Required: Perfect for hot summer days, dorm rooms, or when your oven is on the fritz (or simply occupied with dinner!). This "no oven" factor is a game-changer.
- Lightning Fast: From pantry to plate in mere minutes, often less than 15, making them ideal for unexpected guests or sudden sweet cravings. They truly are the definition of an Minute No Bake Cookies: Perfectly Set Every Time.
- Simple Ingredients: Typically requiring only 6-7 pantry staples like sugar, butter, milk, cocoa, peanut butter, and oats, they’re accessible and budget-friendly.
- Nostalgic Comfort: For many, the taste of a classic no bake cookie instantly transports them back to childhood, evoking memories of grandma's kitchen or carefree summer afternoons.
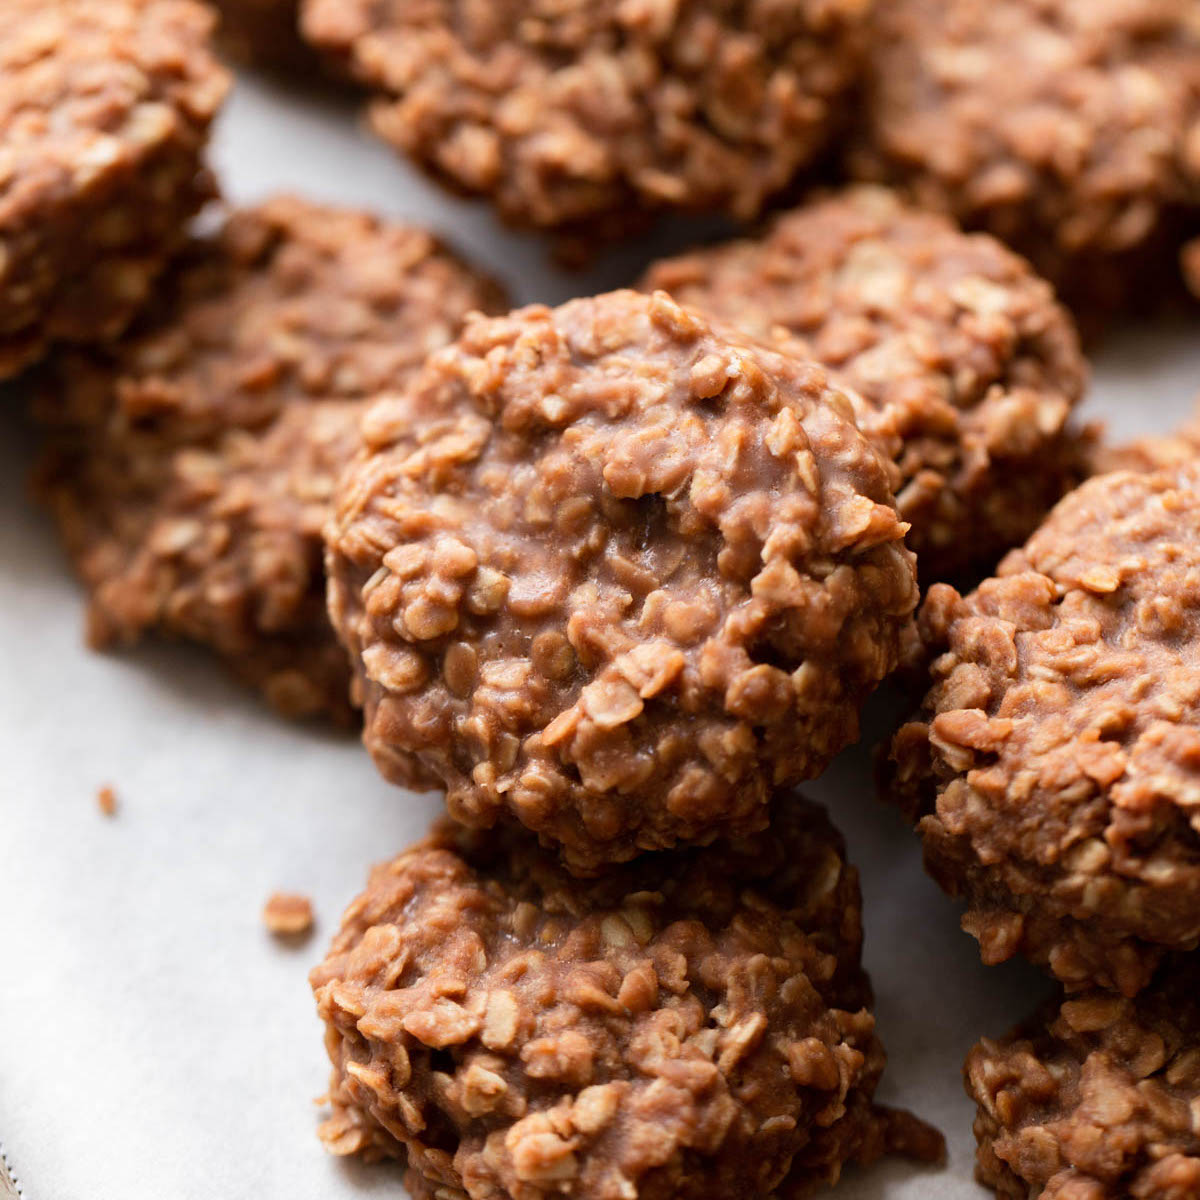
But beyond the practicalities, it's the irresistible flavor profile that truly hooks us. The combination of rich cocoa powder, creamy peanut butter, and hearty old-fashioned oats creates a symphony of textures and tastes. The oats provide a delightful chewiness, while the chocolate and peanut butter deliver a decadent, satisfying sweetness that's hard to resist. This unique balance ensures that each bite is not just sweet, but deeply flavorful and wonderfully textured. While some versions of no bake cookies can be unpredictable, the mastery of a few key techniques ensures a perfect result, moving them from a simple convenience to a reliable go-to treat.
Unlock Stovetop Magic: The Secret to Perfectly Set No Bake Cookies Every Time
The magic of these cookies happens entirely on your stovetop, transforming simple ingredients into a chewy, chocolatey delight. The key to success lies in understanding the crucial steps, particularly the boiling phase, which dictates whether your cookies will be perfectly firm or frustratingly gooey. Let's break down the process to ensure flawless results every single time.
Gathering Your Stovetop Arsenal
You’ll typically need just seven essential ingredients to create these iconic no bake cookies:
- Granulated Sugar: Forms the base of the candy-like coating.
- Unsalted Butter: Adds richness and helps bind everything together.
- Milk: Provides moisture and contributes to the smooth texture.
- Unsweetened Cocoa Powder: The heart of the chocolate flavor.
- Salt: Balances the sweetness and enhances the other flavors.
- Creamy Peanut Butter: Adds depth, richness, and aids in setting (use a good quality, stir-before-use brand for best results).
- Vanilla Extract: Enhances overall flavor.
- Old-Fashioned Rolled Oats: The fibrous backbone, providing chewiness and structure. Avoid instant oats, as they can absorb liquid too quickly and alter texture.
Before you begin, line a large baking sheet with parchment paper or wax paper. This crucial step will prevent sticking and make cleanup a breeze.
The Critical Boiling Phase: Precision is Power
- Combine & Melt: In a medium saucepan, combine the sugar, butter, milk, cocoa powder, and salt. Place over low to medium-low heat, stirring occasionally, until the butter is completely melted and the ingredients are well combined. This gentle start prevents scorching.
- Bring to a Full Boil: Increase the heat to medium-high and bring the mixture to a full, rolling boil. This isn't just a few bubbles around the edge; you want the entire surface of the mixture bubbling vigorously, unable to be stirred down.
- The 1-Minute Rule: Once you achieve this full, rolling boil, immediately set a timer and let the mixture boil for exactly 1 minute (and no longer!). This is the absolute most critical step.
- Remove from Heat: As soon as the minute is up, remove the saucepan from the heat immediately.
Why the 1-Minute Boil is Your Game Changer
The precise 1-minute boiling time is the undeniable secret behind Secrets to No Bake Cookies That Set Perfectly Every Time. This isn't an arbitrary number; it's a carefully calibrated window for sugar crystallization. When you boil the mixture, you're dissolving the sugar and evaporating water. Boiling for exactly one minute allows the sugar syrup to reach the perfect concentration and temperature to form stable sugar crystals as it cools. If you boil too short, there's too much moisture, and the cookies remain soft and gooey, never truly setting. If you boil too long, too much water evaporates, and the sugar over-crystallizes, resulting in dry, crumbly, or hard cookies that fall apart.
The Quick Finish & Setting Up
Once removed from the heat:
- Add Flavorings: Quickly stir in the peanut butter and vanilla extract. Stir vigorously until the peanut butter is completely melted and smoothly incorporated into the chocolate mixture. The residual heat from the boiled mixture will melt the peanut butter perfectly.
- Fold in Oats: Add the old-fashioned oats and stir rapidly until they are thoroughly coated. Work quickly here, as the mixture will start to cool and thicken.
- Scoop & Set: Using a cookie scoop or two spoons, promptly drop spoonfuls of the mixture onto your prepared parchment-lined baking sheet. Shape them quickly if desired, or leave them rustic.
- Cool Completely: Allow the cookies to cool completely at room temperature for about 30-60 minutes, or you can place them in the refrigerator for 15-20 minutes to speed up the setting process. Once cool, they will be firm, chewy, and ready to enjoy!
Beyond the Basics: Tips, Variations, and Storage for Your No Bake Masterpiece
Mastering the classic recipe for no bake cookies is just the beginning. These versatile treats offer a canvas for creativity and, with a few extra tips, you can ensure their perfection and longevity.
Troubleshooting Common No Bake Cookie Mishaps
Even with precision, things can sometimes go awry. Here’s how to handle common issues:
- Cookies Too Soft/Gooey: This is almost always a sign that the mixture wasn't boiled long enough. Too much moisture remains.
- Fix: If it's a fresh batch, you can sometimes carefully scrape them back into the saucepan, gently re-melt, and bring back to a rolling boil for another 30 seconds. Then proceed with adding peanut butter and oats.
- Prevention: Ensure a vigorous, full boil for the entire minute. Humidity can also play a small role; on very humid days, an extra 15 seconds might be needed, but be cautious.
- Cookies Too Dry/Crumbly: This indicates the mixture was boiled for too long, evaporating too much liquid and leading to over-crystallization of the sugar.
- Fix: Unfortunately, dry, crumbly cookies are harder to salvage. You might try adding a tiny bit more milk and gently re-melting, but often the texture is already too far gone. They can still be delicious crumbled over ice cream or yogurt!
- Prevention: Stick strictly to the 1-minute boiling time. Have your timer ready!
Creative Customization Ideas
Once you've nailed the classic, feel free to experiment:
- Nut Butter Alternatives: Try almond butter, cashew butter, or even sunflower seed butter for a nut-free option. Be aware that texture and sweetness might vary slightly.
- Add-Ins: Stir in a handful of shredded coconut, mini marshmallows, chopped pecans or walnuts, or even a sprinkle of sea salt flakes for a sophisticated twist.
- Flavor Enhancements: Swap vanilla extract for a different flavor like almond extract, peppermint extract (especially around the holidays), or a touch of orange zest for a vibrant note.
- Dark Chocolate Twist: Use dark cocoa powder for a richer, less sweet chocolate experience. You can also mix in some dark chocolate chips with the oats.
Proper Storage for Lasting Freshness
Once your no bake cookies have fully set, store them correctly to maintain their deliciousness:
- Room Temperature: Keep them in an airtight container at room temperature for up to 3-5 days. Separate layers with parchment paper to prevent sticking.
- Refrigeration: For a slightly firmer texture and extended freshness, store them in an airtight container in the refrigerator for up to a week. They are delightful chilled!
- Freezing: These cookies freeze beautifully! Place fully set cookies on a baking sheet and freeze until firm (about 30 minutes). Then, transfer them to a freezer-safe bag or airtight container, separated by parchment paper. They can be frozen for up to 3 months. Thaw at room temperature for a quick treat.
The Legacy of Stovetop Treats
The journey of Classic No Bake Cookies from a mid-century kitchen shortcut to an enduring favorite is a testament to their simple genius. They embody the perfect balance of ease, speed, and undeniable deliciousness, making them the ultimate antidote to dessert dilemmas and sweet cravings alike. With a handful of pantry staples and a little stovetop magic, you can create a treat that's not just satisfying but truly memorable.
So, the next time you're in need of a dessert that delivers big on flavor without the fuss of an oven, remember the power of these chocolate peanut butter oat wonders. They’re more than just cookies; they're a reliable friend in the kitchen, a nostalgic embrace, and a perfectly chewy, chocolatey moment waiting to happen.
From hurried birthday parties to quiet afternoon snacks, these easy no bake cookies continue to save the day, proving that sometimes, the best recipes are the ones that keep it simple. Grab your saucepan, gather your ingredients, and experience the pure joy of stovetop magic firsthand. Your sweet tooth will thank you!
